Create a Rainbow

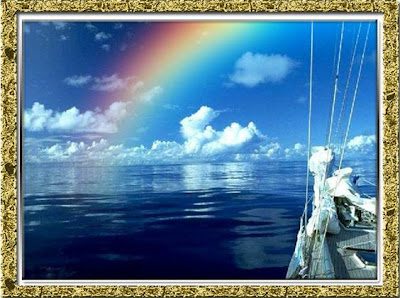
Step 1: Here's the image I'll be starting with

Step 2: Create a New Layer above the Background Layer

Step 3: Select Gradient tool then Click on the Click to edit the gradient now click on the right-pointing arrow then choose Special Effects, this brings up the Gradient Editor dialog box then click Append

Step 4: Now select Russell's Rainbow

Step 5: Select "Radial Gradient" From the Options Bar

Step 6: Select Layer 1 and Shift + Left key Dragging out a radial rainbow gradient from right to left in the image like below

Now your image should look like as shown below

Step 7: Change the Blend Mode of the Rainbow Layer to Screen

 Step 8: Go to Filter > Blur > Gaussian Blur after then radius value of around 36.3 pixels click ok

Step 9: Add a Layer Mask to the Rainbow Layer

Step 10: Set your Foreground color to white and Background color to black now click on the “Click to edit the gradient” after then Choose the Black-To-White Gradient like below

Step 11: Now choose "Linear Gradient"
Step 12: Hold down your Shift +Left click and drag straight up to the top of the image like below

Now your image should look like as shown below

Step 13: Duplicate this layer by pressing Ctrl+J and change Opacity: 75%

This is the final result


